It’s burger time! Many of you have asked for a bun to match your favorite patty. If you like burgers on a light, vaguely sweet brioche bun, topped with sesame seeds and loaded up with condiments–this is the one for you. Others have asked for a bun sturdy enough to hold up to a mega-burger. No matter what dough you choose to use these directions will get you the right shape.
This burger is so full of flavor and a touch of heat that you don’t need anything else with it, but in case you are like me and want it dripping with a cilantro-yogurt sauce and a bit of crunchy salad for texture… Read More
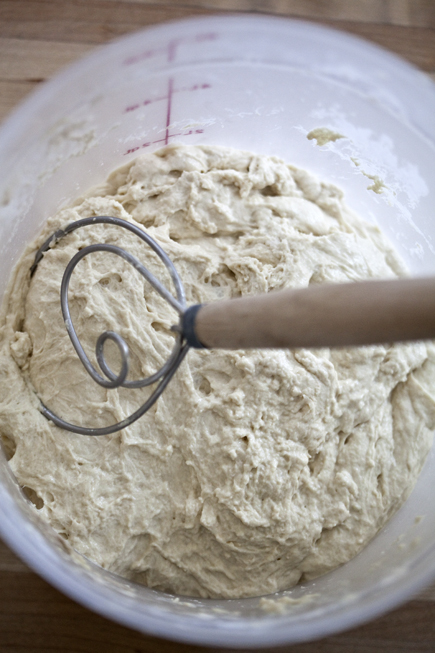
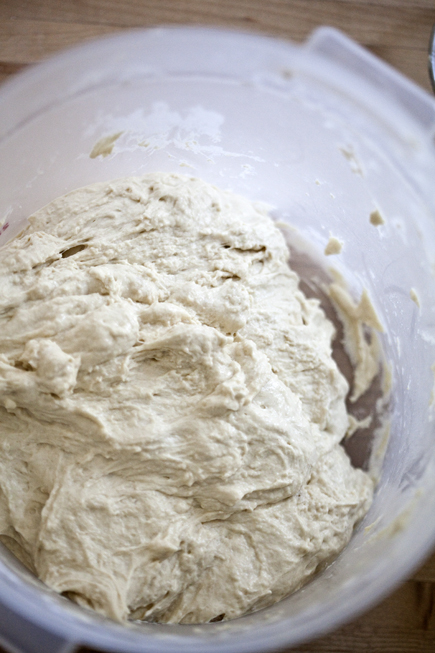
So many of you have asked for close-up video of someone shaping a loaf (what we called “gluten-cloaking” in the first book). Doing this quick shaping step is the same with whole grain doughs, but the feel is different– it isn’t quite as resilient.
But as you can see in the video, it’s basically the same process with this 100% whole wheat dough (the honey-enriched variation on page 92 of The New Healthy Bread in Five Minute a Day).
Our two books were temporarily unavailable from Amazon.com, but everything appears to be back to normal now. You can get the books again, just click on the links:
The “black and white” pumpernickel/rye braid is a New York specialty that brings back fond memories for me. Pumpernickel is a kind of rye, and we included a whole grain version in Healthy Bread in Five Minutes a Day, which also has a rustic Bavarian-Style pumpernickel based on the same dough. Let’s throw together the recipe for this healthy and hearty dough, plus talk about a new feature on our website: The FAQs–Frequently Asked Questions tab… Read More
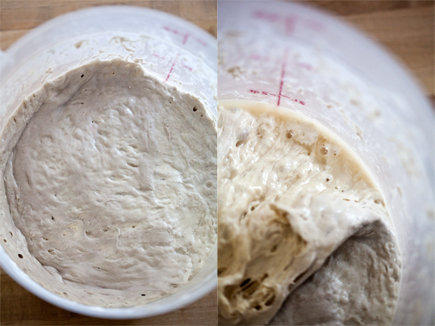
As your dough stores in the refrigerator, it might develop a uniform gray discoloration and liquid on its surface or at the bottom of the bucket. This is not mold and can be safely ignored (scroll down to the bottom of this page for instructions on how to recognize mold). Here are ways to deal with dough that’s developed gray color and liquid on top.
If your dough has a leathery gray top and liquid on the bottom:
If you have a bucket of dough that was untouched for several days, it may develop a gray cast to it. As we mentioned this is safe to consume, but it may have a tough, almost leathery texture (a “skin”). If the dough has become hard and leathery, that suggests that there’s too much air-space in your container (or that it isn’t sealed well enough). You can decrease the effect of air that gets into the container by transferring into smaller containers as the dough is getting used up.
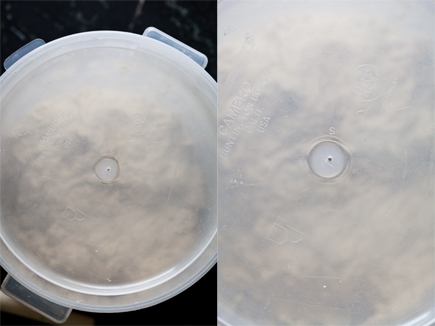
Another way to prevent too much air from getting into your bucket is to poke a small hole in the lid, that way you can snap it shut, but still let the gases escape.
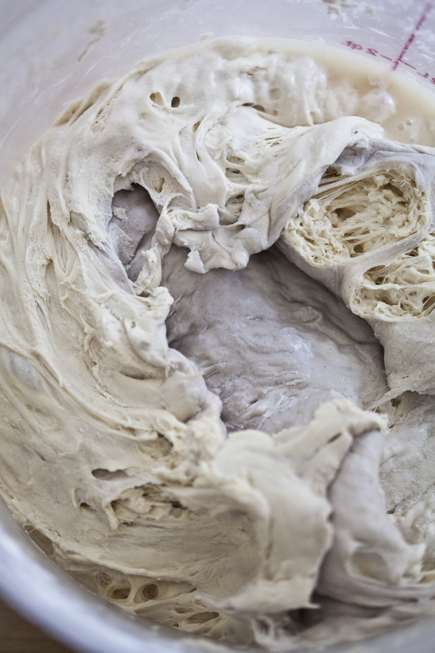
You can simply ignore the gray portion of the dough and form it into a loaf, but you will likely end up with a streak of gray in your dough and that area may be dense. If you’d prefer not to use the gray part, the dough underneath will be creamy in color and full of flavor, so you’ll want to use it. Just peel off or scoop up, depending on the texture, the gray portion of the dough.
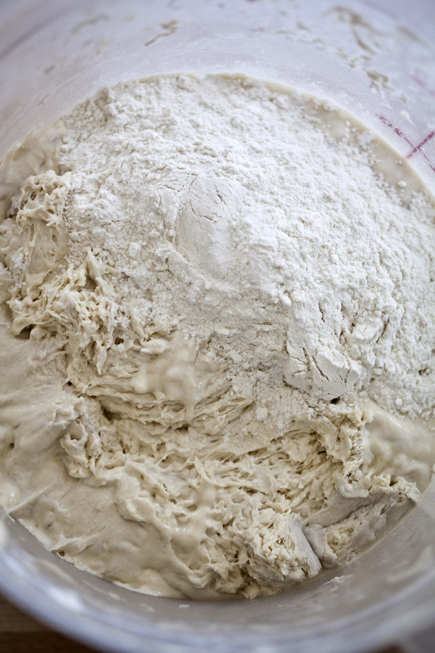
If you find liquid under the dough, which can happen if your dough has sat untouched for several days, just add enough flour to absorb that liquid and get your dough back to the consistency of the original dough.
Mix in the flour and let it sit until the new flour absorbs all the liquid.
It is now ready to use to make bread. Click here to see Fresh Bread made from Older Dough. The dough may spread more than usual, but you will get a lovely loaf that is full of flavor.
If you only have a tiny bit of dough left, even if it is gray and liquidy, you can incorporate it into your next batch of dough to jump-start the flavor in your next batch: Click here to find out how.
*Is it mold? If you see patchy light or dark areas on your dough, whether smooth or fuzzy, that could be mold and the dough should be discarded. You are not likely to see mold if you follow our directions for maximum storage life, and keep the dough in the refrigerator.
Well, no, not here on this website. But you can post pictures to Flickr by joining the Flickr grouphttps://www.flickr.com/groups/artisanbreadinfive/ and upload pictures there. Then you can post the link to your picture in any of the “Comments” fields here on the site.
Look forward to seeing your shots!
Note: BreadIn5.com is reader supported. When you buy through links on the site, BreadIn5 LLC earns commissions.
Short answer: Nothing. I’ve found that stones do not last forever, though my first one lasted through 11 years of daily baking. It seems clear that the 1/2-inch thick ones are very durable, and and some brands (not all) of the 1/4-inch thick stones are less so.
Incidentally, you can often use the broken pieces of the stone, depending on the size and shape of the fragments.
Alternatives to these ceramic stones include the newer cast-iron pizza “stones,” or even just a cast-iron skillet, which I’ve found work quite nicely. Or try a Dutch Oven or a baking cloche, though my best guess is that cloches, being ceramic, are eventually going to break like the stones. Iron, definitely not–these should never have a problem with cracking.
In my method, proportionally more of the rise comes from “oven spring,” rather than “proofing.” Traditional bread methods get more proofing rise than we do. Proofing is the time that the shaped loaf spends just sitting and waiting for the oven. Oven spring is the sudden expansion of gasses within the pores of the loaf that occurs upon contact with the hot oven air and the stone or other hot surface that you might be using.
Don’t be surprised if you don’t see a whole lot of rise during proofing with our method. You’ll still get a nice rise during the oven spring, so long as you didn’t over-work the dough while shaping. Make sure your oven’s up to temperature by checking with a thermometer like this one on Amazon. If the oven is too cool or too hot, you won’t get proper oven spring.
If you’re still not happy with the final result– if it seems to dense and under-risen, check under “Dense Crumb” FAQ.
Our new bookhas a terrific braided challah with whole wheat and wheat germ, and I’ve been playing with a variation that includes cranberries and orange zest. This same challah recipe lends itself to many other holiday traditions as well, forming the basis in our book for Scandinavian Christmas breads like Pulla and Julekage. It’s really just a lightly enriched yeast dough that is very, very versatile. The recipe… Read More
We try to make only enough bread to eat on the same day, but if you have leftovers, the best way to store homemade bread is unwrapped and cut-side down on a non-porous surface like a plate, at room temperature (not in the refrigerator). This preserves the crust a little more than if you put it into a plastic bag, which softens the crust very quickly. The exception is pita bread, which is soft-crusted in the first place and is great in a plastic bag–but wait till it cools before bagging.
How long can you store bread this way? Maybe 24 hours. You can extend that a little if you put it in a plastic bag (refrigeration optional), and it’s often OK for toasting a day or two later.