Dense or gummy interior, or inadequate rising in my gluten-free breads. What am I doing wrong?

Return to Gluten-Free FAQs

If the breads in Gluten-Free Artisan Bread in Five Minutes a Day are coming out dense or gummy, or don’t seem to rise as much as you expect, here are the things to check:

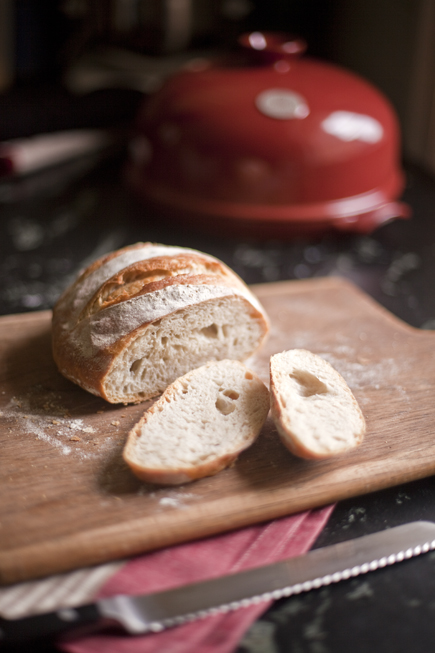
Expectations: No question about it, gluten-free breads are denser than wheat breads, and they don’t rise as high. Plus, they get most of their loft in the hot oven (that’s called oven spring). Don’t expect to see a lot of visible change while the loaf is resting (after its shaped).

If you’re not loving the no-egg version: Since 2009, our wheat books have included one chapter with gluten-free recipes, always with eggs. Many of our gluten-free readers asked for gluten-free recipes that were also egg-free, so when we wrote Gluten-Free Artisan Bread in Five Minutes a Day in 2014, we made our default Master Recipe egg-free, with a variation that includes whole eggs or egg whites (on page 73). But–there’s no question that the egg versions have better rise and are less dense. If you can eat eggs, our favorite is the egg white version; there’s more on this at a post describing the version with egg. If you cannot eat eggs and you’re finding the no-egg version too dense, go through all the tips on this page–and if you’re still not happy with the density of the loaf-breads, consider using the dough for flatbreads that won’t require as much structure and loft.

If you’re making the gluten-free recipes from The New Artisan Bread in Five Minutes a Day, there were typos that mainly affected the gluten-free recipes. Click here to view the corrections. The recipes will seem much too wet without these corrections.

Inadequate mixing: Consider using a stand mixer if you’re finding the loaves to be denser than you like. It’s certainly possible to get good results by mixing with a spoon or dough whisk, but you really have to work at it, to get a completely smooth mixture, and some of our readers are giving up too soon. Bottom line, the stand mixer will give more reliable results. One thing to be aware of–the very high capacity stand mixers (eg., 6-quart) don’t work well for this gluten-free dough–it seems to “climb” up the flat beater and avoid the mixing process. Stick with about a 5-quart capacity.

Wrong hydration: In other words, too much or too little water relative to the flour mixture. If you’re swapping for a flour that we didn’t test with, go back to Bob’s Red Mill gluten-free flours (not their flour mixtures), which are the only ones readily available in U.S. supermarkets, and test again. Other flours may absorb water differently, and you may need to adjust. If you can’t find Bob’s, you may need to adjust the water–take a look at our videos so you can see what the dough looks like fully mixed. If there’s no explanation for your overly wet dough, consider mixing it a little drier next time–increase the flour by 1/8-cup, or decrease the liquids a little.

Swapping in a flour or other ingredient we didn’t test with: As above, all bets are off if you aren’t using what we tested with. In particular, we did not have good results with rice flours from Asian markets.

Measurement  problems: You’ll get most accurate results if you weigh the ingredients rather than using cup-measures. We’ve had good experience with the Escali and the Eatsmart digital scales. Cup measures may be allowing too much (or too little) flour, which throws off the hydration. If you do use cup-measures, be sure to pack gluten-free flours into the cup (like you were measuring brown sugar). These flours are powdery, and we found this to be the only way to get reasonably consistent volume measurements with gluten-free flours (this is very different from what we recommend in our wheat-based books and in videos and posts here on the website).

Oven temperature may be off… which can wreck your “oven spring.” Always check with an oven thermometer.

Adequately preheat your baking stone: Some ovens and stone combinations require a longer preheat than the 20 or 30 minutes we specify in the book.

Resting time: Make sure you’re resting for the full interval that we recommend in the book.

Large loaf: In general, we tested these as small loaves (usually one pound), so if you made something larger, rest them for longer, and bake them for longer.

Return to Gluten-Free FAQs

Crock Pot Cinnamon Rolls

Crock Pot Cinnamon Rolls

Well, we’ve made our Master recipe in a crock pot, our brioche in a crock pot, dinner rolls, and even our gluten-free dough in the slow cooker. It seemed a good time to add to the list, and so we took on crock pot cinnamon rolls. I’m happy to report that they work just as well; it’s as easy as rolling out dough, brushing some butter and sprinkling sugar, shaping rolls, and then letting them bake for an hour. My family couldn’t tell they weren’t baked in the oven, and my kids had the best after school snack of the year.

Read More

Truck Stop Cinnamon Rolls!

Fresh baked truck stop cinnamon rolls

Making cinnamon rolls is hands down one of the most popular ways that folks use our brioche dough. Not only is this an easy dough to prepare, but since it can be used for up to five days after being made, there is the potential to eat cinnamon rolls every day of the week. Of course, we stand by the phrase “all things in moderation,” but it’s still nice to know that there’s a way to make every Monday morning more enjoyable.

Truck stop cinnamon rolls are not much different than our regular buns, they are just significantly bigger (each one can serve two. Or more?). They are perfect for brunch or company; a special indulgence.

Read More

Focaccia Bread, Two Ways!

meyer lemon + thyme focaccia | bread in 5

Focaccia is terribly delicious; it’s a perfect accompaniment to pasta or soup, and it even makes great afternoon snack. While focaccia can be topped with all kinds of ingredients, we prefer ours rather simple: onions and rosemary scattered on an olive oil-dough flatbread. We even keep the ingredients light to promote nice browning, and the results are a well-flavored bread with a crisp crust. If you’re feeling more adventurous you can try a Meyer lemon-thyme version; Meyer lemons are much sweeter than regular lemons and are a delicious option. If you slice this kind of lemon very thinly, then yes, you can eat the peel.

Read More

Pizza on a Baking Steel

pizza | Breadin5

In the original review of baking stones, steel stones weren’t covered because they weren’t yet available. So here’s a test run of the Baking Steel. Just like cast iron, the Baking Steel is virtually indestructible, heats up a bit quicker and conducts heat really well. It’s larger (14×16 inches), and rectangularly shaped, while the cast-iron Lodge product is round, and smaller, with more chance for stray ingredients to go overboard. That’s in favor of this alternative metal product.

baking steel | Breadin5 Read More

Braided Peasant Bread

Braided Peasant Bread | Artisan Bread in Five Minutes a Day

Braiding doesn’t just have to be for sweets. I found myself with some 2-week-old dough (truth be told it was closer to 3 weeks) and it was a little wet to shape a nice tall boule. We always recommend using older dough for flatbreads or baking it in a loaf pan, since it can lose some of its rising power in the later stages of storing. Well, it turns out this older dough makes a wonderful braided peasant bread loaf, with lots of flavor and a really open crumb. Because the braid isn’t as domed as a boule, the older dough has all the rising power it needs.

My dough was made with all-purpose flour, a bit of rye, whole wheat and Platinum yeast by Red Star. Like I said, it was almost 3 weeks old, but this technique can also be done with fresh dough and really any of our doughs, not just the Peasant dough recipe will work great. Read More

Braided Chocolate and Cocoa Nib Bread… and announcing a winner of the giveaway!

braided chocolate and cacao nib bread | bread in 5

I’ve been slightly enamored with braided bread this Holiday season – it’s been popping up all over our Pinterest boards, in loaf, wreath, cake, and roll form. I was especially interested in a krantz cake Tara from Seven Spoons made recently; her loaf was braided and twisted so beautifully, and I was sure there was a way to turn it into a Bread in 5 version. Some brioche dough and chocolate-cacao nib filling later, and I had a winner. This bread is a looker, the chocolate leaving swirls throughout and the sugar glaze giving the finished bread a sparkly sheen. It’s sweet but not overly so, and the cacao nibs give just the right amount of crunch. It’s a great edition to your Holiday baking line up.

And, as promised, we have a giveaway winner….congratulations Janna, we’re sending you the Emile Henry Bread Cloche, some flour, Platinum Yeast from Red Star and a Signed Copy of The New Artisan Bread in Five Minutes a Day. Enjoy!

Read More

Baking in a Cloche

Emile Henry Cloche 09

There are many ways to get a crusty loaf of bread, but one of our favorites is to use the tried and true method of baking in a clay cloche, here, the Emile Henry brand cloche. It is very similar to using a Dutch Oven, but the cloche was designed to bake bread, so it is an even more intuitive method. In other words, you aren’t lowering the bread into the piping hot vessel, you just lift the lid and slide the loaf onto what is essentially a baking stone. The cloche traps the steam from the dough to create a perfectly crisp and beautifully shiny crust, without having to add steam to the oven.

This loaf was made with the Master Recipe from The New Artisan Bread in Five Minutes a Day: Read More

English Muffins On The Stove Top

english mufins | bread in 5

Breakfast has been said to be the most important meal of the day, but so often it is made up of coffee and not much else. I make a point to purchase store-bought bagels and English muffins to have on hand, but they lack flavor and I find myself skipping that first meal more often than not. I remembered back to a post on baked English Muffins, and decided to try the same technique on the stove top to save some time. Sure enough, they were amazing! Soaked in butter and a little jam, or filled with eggs and cheese, these biscuits were worth making every time. They also re-toasted well; I made a large batch Sunday morning and had a delicious breakfast the rest of the week.

Read More