Baking Stones for Pizza and Bread: Some Aren’t Stones at All

… some of them are metal, so read on.

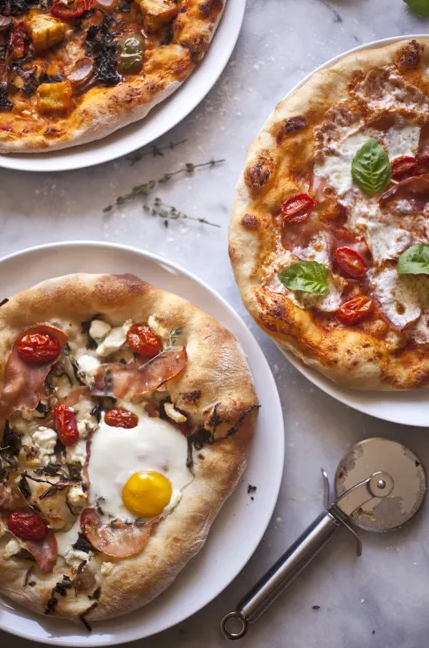
Readers have been asking me about baking stones for holiday gifts, which I heartily endorse, so here’s my rundown of the options. Baking stones are sometimes sold as “pizza” stones, but no matter how they’re labeled, they’re great for freeform loaf breads as well.

My Top Pick: Ceramic

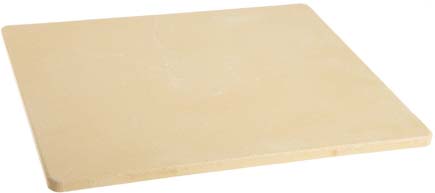
My personal favorite for a ceramic stone, when I’m making more than one bread or pizza, is a large rectangle, so there’s little chance of stray ingredients going overboard and burning on the bottom of your oven:

1. The Old Stone brand 14-Inch by 16-Inch baking stone. Note that none of the ceramic stone manufacturers guarantee their product against eventual cracking, but my Old Stone is over 20 years old and still going strong. It’s heavy and a half-inch thick, so it’s got lots of heat mass, producing a great crust, as long as it is properly preheated. I prefer a 40-minute preheat with a stone this thick, or even an hour. And because of the large size, you can bake multiple loaves or small pizzas and nothing falls off the edge. Old Stone also makes a 16-inch round version and it’s considerably lighter. Note: I’ve avoided the Pampered Chef ceramic stones because readers have written to say that they’re prone to cracking and I had the same experience with a borrowed one (awkward).

… on to a couple of metal options:

My Top Pick: Metal

2. When I’m making a single bread or pizza, I prefer using lighter, pre-seasoned cast-iron. The Lodge Cast-Iron 14-Inch Pizza Pan is virtually crack-proof, unlike thin ceramic stones (not the Old Stone above). Cast-iron has different properties so it can preheat in 20 minutes and still create a crispy, caramel-colored bottom crust (your oven’s result may vary, so experiment to be sure the short preheat is working for you). It can even be preheated, at least partially, on the stovetop! Because iron conducts heat fast, it also cools off quicker.
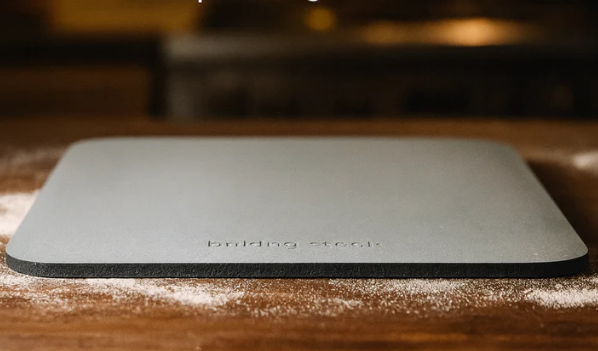
Splurge Pick

3. Another indestructible non-ceramic “stone” is the Baking Steel (its actual brand name). Like the Old Stone ceramic above, it’s large, so it prevents ingredients from going overboard. It works well, but it’s pricey:

Budget Pick

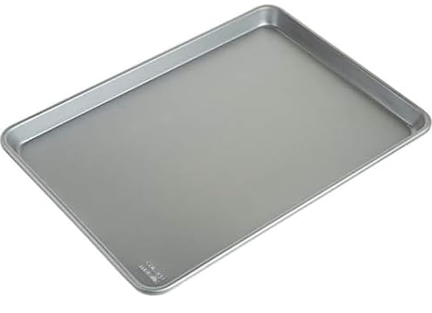
4. If you’re not ready to invest in a pizza/baking stone, heavy-gauge baking pans are a reasonable option. I like the uncoated Chicago Metallic pan, and though you won’t get as crisp a crust, it’s great for newbie bakers and especially good if you’re in a hurry (quick preheat). Preheat the pan and put the bread or pizza (well-dusted) directly onto it, without parchment or Silpat to get the crispest crust. If you use parchment or a Silpat be sure to remove it for the last few minutes of baking to crisp up the bottom crust (watch for manufacturers’ recommendations on maximum allowable temperature). You can also take the bread or pizza off the pan and crisp up the crust directly on an oven rack.

Reconsidered Pick

5. In the past I’ve recommended unglazed, food-safe terra cotta garden tiles, mostly because they’re easy to find and inexpensive. But they’re thin and small, so you have to push several together to make it work. The one time I tried this (at a demonstration; again, awkward), flour and cornmeal slipped between the tiles and burned on the bottom of the oven for a smoky mess, so I’ve since avoided them. If you’ve had better luck, let me know!

Also Nice to Have

What if your giftee already has a baking stone? Bench Scrapers are excellent for cleaning ceramic stones. Use one to scrape off excess flour, cornmeal or cheese. AVOID SOAP or your stone may impart a soapy taste or odor. Just use hot water and let it dry slowly in a cool oven to avoid cracking. For the Lodge pre-seasoned cast-iron pan, scrape it if there’s visible thick, burned-on gunk. You can then brush it with hot soapy water, according to Lodge’s care instructions.

Food and pizza for thought, no? Happy December, everyone. More soon!

Note: BreadIn5.com is reader supported–when you buy through links on the site, BreadIn5 LLC earns commissions.

Raisin Walnut Bread

Raisin Walnut Bread | Artisan Bread in Five Minutes a Day

We addRaisin Walnut Bread | Artisan Bread in Five Minutes a Day

Raisin Walnut Bread Ingredients | Artisan Bread in Five Minutes a Day

Raisin Walnut Bread

3 cups lukewarm water

1 tablespoon instant or active dry yeast

1 tablespoon kosher salt

1 cup whole wheat flour

5 1/2 cups all-purpose flour (if you use King Arthur or other high protein flours, you may need to add up to a 1/4 cup more water)

1 cup raisins

1 cup walnuts

2 teaspoons cinnamon

In a 6-Quart Round Storage Container add the water, yeast, salt, flours

Adding raisins to bread dough | Artisan Bread in Five Minutes a Day

raisins

A bowl of raisins and walnuts | Artisan Bread in Five Minutes a Day

walnuts and cinnamon.

Raisin Walnut Bread | Artisan Bread in Five Minutes a Day

Mix with a Danish Dough Whisk, a wooden spoon or a stand mixer.

Raisin Walnut Bread Dough | Artisan Bread in Five Minutes a Day

Let the dough rise for 2 hours and then you can use it right away or it can be stored for about 7 days.

Raisin Walnut Bread Dough | Artisan Bread in Five Minutes a Day

Pull out a 2-pound piece of dough, about half the dough in the bucket.

Raisin Walnut Bread Dough | Artisan Bread in Five Minutes a Day

Quickly shape it into a smooth oval.

Floured ceramic bread pan | Artisan Bread in Five Minutes a Day

Generously grease and flour the base of the bread baker.

Raisin Walnut Bread Dough | Artisan Bread in Five Minutes a Day

Place the dough into Bread Loaf Baker.

Bread Dough Baker | Artisan Bread in Five Minutes a Day

Cover and let rest for 1 1/2 to 2 hours. This will depend on what else you have going on and how chilly your kitchen is.

Raisin Walnut Bread Dough Rising | Artisan Bread in Five Minutes a Day

Preheat the oven to 450°F.

Uncover the loaf and use a Pastry Brush to paint with water.

Raisin Walnut Bread | Artisan Bread in Five Minutes a Day

Because this baker has a lid it traps the internal moisture of the dough, almost like a Dutch Oven, to create a shiny, crisp crust. Since it has the small holes, the crust will also color nicely during the baking without having to remove the cover.

Bake for about 45 minutes. If you open the lid and it is not yet golden brown, let it bake another 5 minutes.

Let the bread cool in the baker for 5 minutes

Raisin Walnut Bread Turned Out of a Bread Pan | Artisan Bread in Five Minutes a Day

Turn the loaf out of the pan after 5 minutes and then let cool completely.

Raisin Walnut Bread | Breadin5 17

After you’ve enjoyed some of your bread you can slip it back into the baker to store it on the counter.

Raisin Walnut Bread | Artisan Bread in Five Minutes a Day

Since the cover has holes the loaf won’t get soggy, but it is protected enough to keep the bread from staling as quickly. It also happens to keep nosey puppies from the counter.

Raisin Walnut Bread | Artisan Bread in Five Minutes a Day

Here is the loaf baked in a regular loaf pan. You can see that the crust is pale and dull looking in comparison. It was still as tasty, but without the trapped steam the loaf just wasn’t as appealing. You’d have to add steam to the oven if you were to bake it in this style pan.

Lesaffre Yeast Corp. (Red Star) provided samples of yeast for recipe testing, and sponsors BreadIn5’s website and other promotional activities. Emile Henry provided bakeware and sponsorship.

Whole Grain Christmas Stollen

stollen-hbin5-3-of-16

Christmas Stollen is a wonderful German baking tradition this time of year. A sweet loaf that is studded with dried fruit, spiced with cardamom and a special treat of almond paste runs through it. Once it comes out of the oven it is traditional to slather the warm loaf in butter then roll it in sugar, but we skip the extra butter and dust it with a thick layer of confectioners’ sugar to look like the snow outside. This loaf actually holds up very well for a couple of days and that makes it a great gift for the holidays.
Read More

How to Slash Dough – Video

slash Bin5 03

Slashing your dough properly creates a beautiful loaf of bread, but can also help it rise in the oven. If your slashes are not deep enough, the dough may tear open on the top or bottom of the loaf. Leaving you with bread that tastes delicious, but doesn’t live up to its artistic potential. The loaf can also end up being a touch dense if you don’t slash deep enough, because it won’t open up and make way for a dramatic oven spring. So, for the most beautiful crust and best interior crumb, you’ll want to follow these few tricks for slashing. Read More

Crock-Pot Nutella Swirl Bread

crock pot swirl bread 12

Last weekend I lived the ultimate bread bakers’ dream. Thanks to my friends at Red Star Yeast I travelled to the heart of wheat country in Kansas and had the great honor of judging the National Festival of Breads baking contest. The contestants submitted their recipes and were chosen from hundreds of bread bakers from across the country. Eight women came to Manhattan, KS and baked in a theatre-style kitchen in front of about 1,500 bread lovers. They deserve a prize for that alone. The breads were all amazing, but one by Lisa Keys of Good Grief Cooks was the one that stood out to all the judges. Her Smokehouse Cranberry Cheese Bread had a combination of flavors, texture and beauty made this the clear winner. You can read all about the contest (you should consider entering for the next one), the contestants and their winning recipes at the National Festival of Breads.

Another absolutely gorgeous loaf that was baked for us was a chocolate swirl bread. I’ve recreated that idea with our Whole Wheat Brioche dough and a swirl of Nutella. It is healthy and decadent all at the same time and it’s baked in a crock-pot. I turned to my crock-pot when I turned on the AC for the first time yesterday and I really didn’t want to heat up the kitchen by cranking up the oven. The crock-pot is ideal for this Nutella swirl bread, since it fits the shape and we want a soft crust. The result was perfect.

Read More

Super Peel Giveaway CONTEST CLOSED, WINNER HAS BEEN ANNOUNCED

Super Peel | Breadin5 04

This is a Super Peel. It is one of those products, like the Danish Dough Whisk, that changes the game for baking with our dough. I was skeptical that this cloth-covered peel would do the trick of transferring our wet dough onto the hot stone in the oven without sticking. I’ve come to use parchment to guarantee the dough won’t stick to the peel, but that’s not at all necessary with the Super Peel. Even after an 1 1/2 hour resting time the dough slid right off the cloth, no sticking, no prying it off with a dough scraper. Voila! The most exciting part is that it scoops the loaf off the hot stone with as much ease. No more chasing the loaf to the back of the oven while trying to get it back on the peel.

Now that we are heading into grilling season, and there is nothing better than pizza on the grill, you have to watch this video about using the Super Peel for transferring pizzas. Gary Casper invented the Super Peel and generously shared the Peel with me to try out. I loved it so much I asked him to do a giveaway so we could share one with you. *Leave a note in the comments below and you will be eligible to win a Super Peel. The winner is: Sandy! We’ll be in touch, Sandy. Read More

Gluten-Free Crock-Pot Bread

YES, it you can also make gluten-free crock-pot bread! This is the “Not Rye (But So Very Close)” recipe from The New Healthy Bread in Five Minutes a Day. Check with your slow-cooker’s manufacturer before trying this, since some model’s instructions specify that the pot has to be at least partially filled with liquid to avoid safety or durability problems.  And never bake in a slow-cooker unattended. Read More